How to make a Discord Bot (using Docker and Raspberry Pi)
Preliminary Notes
- Estimated time to complete
- 1-2 hours
- Main application files
- Docker files
- All scripts (on my Github):
Introduction (00:00)
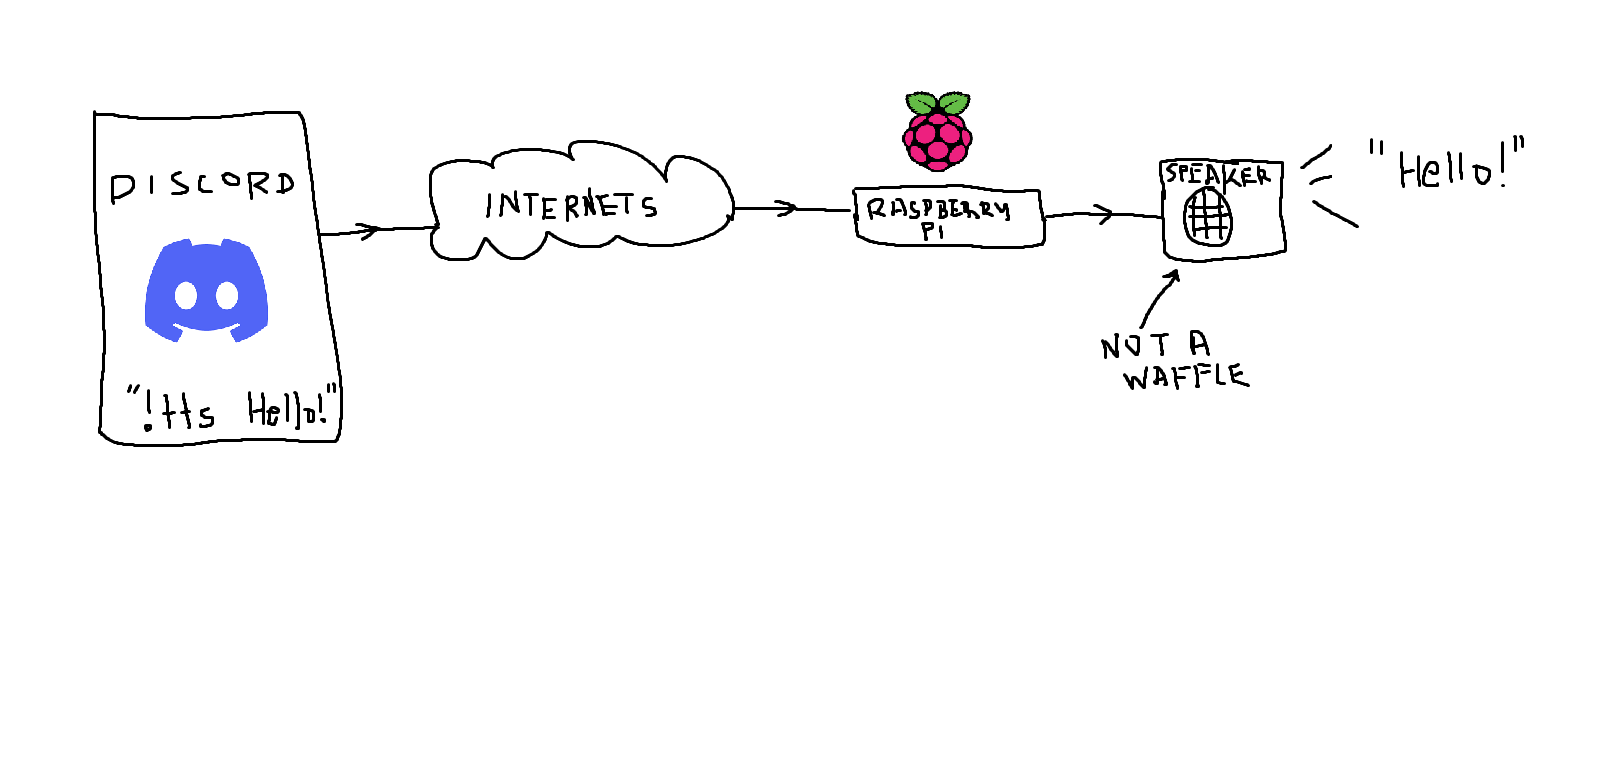
Hello everybody! Today, I want to show you how you can create your own Discord bot. You can do SO many different things with a Discord bot, and you may find some use out of one even if you don’t use Discord! This tutorial specifically will show you how you can make one play music from Youtube and talk to you using text to speech using a combination of Discord, Docker, Node JS, and a Raspberry Pi.
If you’re interested in tinkering with Raspberry Pis, creating and configuring your own Discord bot, Linux, Docker virtualization (pretty hard to wrap your head around without actually getting in and trying it out for yourself), and making applications with Node JS, or even if you don’t know what any of that is — this is a tutorial that anybody can follow and is a great beginner project to teach you some of the basics for these technologies and what you can do with them.
Today, we’re essentially making a smart speaker. Now, I know that some of you may not think much of this concept of a “smart” speaker initially, but just the concept ALONE is pretty cool since you can extend this to basically anything you’d want it to do, all by using Discord as the controller/command interface.
I had an idea one day, stemming from an experience I had at my friend’s house involving a bluetooth speaker, Michael Jackson grunting noises, and me being unable to do anything about it. I explain more about that in my video, but let’s jump into the tutorial here.
There were three main goals with this project:
1. Send audio through to a speaker remotely at all times
To do this, I knew a Raspberry Pi would be the easiest tool to use to interface with my “command center”. The command center in this case would be Discord, and the Raspberry Pi would process the commands, turn them into audio, and output that to a speaker.
I used the DiscordJS module on a NodeJS Docker container running on a Raspberry Pi. The Node app will recognize commands that are received from Discord. The main function of the Node is that send audio files to the Pi from Youtube, but it can also process text to speech.
2. Create an easily deployable app (easy to set up for pranks, easy for others to replicate)
To do this, I knew that I wanted to use Docker. Docker makes it easy for other people to pull your image to their setups and just run it without thinking too much about dependencies and other requirements. You can definitely do this without Docker, but you’d need to install Node locally on the Raspberry Pi, which can be problematic if you want to run other web servers or software on the Pi (but still possible). Unfortunately, I wasn’t able to completely contain this project within a Docker container as I couldn’t find a way to process the audio files in Node/Docker, but there may be a way to do it – I think I’m just not experienced enough with Docker yet to figure it out. To get around that, there are some scripts that need to be ran and some software that needs to be installed on the Raspberry Pi locally to make things happen.
3. Not spend too much money
The cost of this project was definitely on the lower side, coming out to around $100 if you don’t have all the parts already (and you probably have a Raspberry Pi already if you’re reading this). All you’ll need if you already have a Pi is a speaker, which cost anywhere from $15 to $30 for an average speaker. The app in this tutorial was designed to run alongside other processes on a Raspberry Pi, so you could run something like a MagicMirror and this app at the same time if you wanted to (that way, you don’t have to buy another Raspberry Pi just to run this).
I only somewhat fulfilled these requirements, but I ended up with an interesting product that might actually have some practical uses apart from the pranking aspect. I’ve realized that you could also use it like an online jukebox — if you have friends over, they could each individually play and queue different songs using this app and without having to download a separate app (assuming people have Discord on their phones). This also means you don’t have to use the same phone to queue songs.
It’s a relatively simple bot that can definitely be expanded to do more stuff. All I want to show is how to use Discord as a command interface for your Raspberry Pi and some of the potential uses for it as well as expose you to a beginner Docker project. Some of the other uses that I thought of which might be cool to program would be to use Discord as an interface to control lights in your home, receive a security camera recording or photo from a security camera setup, or pull useful performance data (temperatures, CPU usage, storage, etc.) for your servers in your home lab. There’s a TON of potential here – be sure to let me know if you think of anything else that you could see this doing.
Requirements (08:05)
- A computer to connect to the Pi and configure the app
- Chargeable speaker with 3.5mm jack input
- This is the speaker that I used, but it is not the best speaker to use for this project because it turns off automatically if it isn’t playing anything. For this project, I recommend using a speaker that does not have an auto shutoff function.
- 3.5mm headphone cable
- Any length will do, but get a longer cable if you don’t want the Raspberry Pi to be in the same place as the speaker (i.e., you probably want a longer cable if you want the speaker in a different room or on the other side of the same room).
- Raspberry Pi 3 (or 4) setup with Raspbian Buster and ssh enabled (insert video link with timestamp at setup?)
- MicroUSB power cable (the link above includes a power cable)
- Micro SD card
- Case (the link above includes a case)
- Note: You can run this project alongside other applications as it doesn’t take many resources to run, so you don’t necessarily have to buy a new Pi for this project if you already have one
- Familiarity with Docker and NodeJS
- Familiarity with bash and javascript
- I recommend that you know what’s happening because it will help a lot, but this tutorial is meant so that even if you know nothing about these technologies that you’ll be able to follow along
Instructions (09:41)
- Install Docker and dependencies (09:41)
- If you don’t know what Docker is, you should watch this video. It’s only 2 minutes, but it provides a lot of important information.
- Install Docker on your primary computer: https://docs.docker.com/desktop/
- If you’ve never used Docker, I HIGHLY recommend going through the beginner tutorial. Here are my notes from when I went through the Docker tutorial
- Install WSL (Windows Subsystem for Linux) if you’re using Windows and be sure to install the WSL features for Docker
- Install Docker on the Raspberry Pi: https://phoenixnap.com/kb/docker-on-raspberry-pi
    ### Install Docker ###
    # Get Raspberry Pi installation script from Docker website and run it
    curl -fsSL https://get.docker.com -o get-docker.sh
    sudo sh get-docker.sh

    # Add your main user to the docker group (default raspberry pi user is "pi")
    sudo usermod -aG docker pi

    # (Optional) Check Docker version
    sudo docker version

    ### Install other dependencies ###
    # Update Raspberry Pi OS and software
    sudo apt upgrade
    sudo apt update

    # Install bot media watchdog tools (used in script 'watchmediadir.sh')
    sudo apt install inotify-tools

    # Install text-to-speech (TTS) processor
    sudo apt install espeak
- Set up a Discord bot on your Discord (10:27)
- Use this guide or this video tutorial to set up a Discord bot on your Discord
- You can skip the steps after the “Prepare your Node.js project workspace” section, unless you want to want to learn more about how the bot functions.
- (Optional) If you you want to test what’s being shown in that guide past the “Prepare your Node.js project workspace” section, you should do so on either your main computer or a Docker container on your Raspberry Pi rather than the Raspberry Pi itself. This is because we don’t want Node.JS to be installed on the Raspberry Pi locally.
- Build the app (11:08)
- For this tutorial, you can just copy what I have. If you’d like to copy the app that I built, skip this step and move on to step 4.
- Basic Node apps are composed of an application file
app.jsand files to specify dependencies (package.jsonandpackage-lock.json). - See files here app.js, package.json (note: package-lock.json has to be generated on your machine (see video at 00:00))
- You also have to register the commands that your app uses by contacting the Discord API as described in this guide (see video at 00:00)
- Example deploy-commands.js file
- Note: You will have to rerun these commands every time you make additions or edits to your commands in your bot
- I used this article to figure out how to build the Node app
- I’ve programmed three functions:
- /tts
- When you use this command, the app will create a text file, which the Pi will read by which creates an .mp3 file from the text and then the script will play the file.
- /play
- When you use this command, the app will download a Youtube video into an .mp3 file, which a script will then play. Unfortunately, I couldn’t figure out a way to validate input, so if somebody requests a 10 hour video, I think it would overload the Pi and/or crash the app
- /save
- When you use this command, the app will download a Youtube video into an .mp3 file, but not play it. This is just if I want to save any Youtube audio, like some songs that are only on Youtube and not available elsewhere.
- /tts
- Sources:
- https://developer.mozilla.org/en-US/docs/Learn/Server-side/Express_Nodejs/development_environment
- https://nodejs.org/en/
- Install Node v12+ (Recommended for most users)
- https://hub.docker.com/r/arm32v7/node/
- https://www.npmjs.com/package/discord.js
- https://discord.js.org/#/docs/main/stable/general/welcome
- Set up the Docker image and container (12:27)
- I used this article to figure out how to ‘Dockerize’ the Node app
- Make sure that if you share your code with others to strip out any sensitive information, like client tokens. Check out my video or see the sources below if you want to learn more about how everything works up to this point.
- If you’d like to copy the app that I built, you can use these commands (substitute the first part of the directory in
-vbefore the:accordingly) and then skip to step 5:docker pull jftorres/armv7ttsappdocker run -p 49160:8080 -v /home/pi/discordbot/media:/usr/src/app/media -d jftorres/armv7ttsapp
- If you’d like to build the image yourself, you need to create a Dockerfile (see mine as an example).
- Once all the files are created (shown in image below), run the
docker buildcommand (substitute Docker image name accordingly):
- Create scripts to process files (18:43)
- These scripts exist on the Raspberry Pi rather than within the Docker container.
- This script is used to start the Docker container upon reboot.
- This script is used to monitor a directory for new files created by the app. This will look for .mp3 files created by the /play and /save commands as well as .txt files created by the /tts command and process them accordingly. It will also queue them if people request multiple songs or tts.
- These scripts will need to be run automatically, so I made cronjob tasks to start them in the morning.
- See this site to help configure your cronjobs
- These scripts exist on the Raspberry Pi rather than within the Docker container.
- (Optional) Create scripts to help with building (20:32)
- These scripts aren’t necessary but definitely help with operations and maintenance of the app
- Use this script to build the bot (helps to host app files on Github, but not necessary)
- Use this script to adhoc restart the bot
- These scripts aren’t necessary but definitely help with operations and maintenance of the app
Conclusion
In conclusion, this bot is pretty much just for fun and has not much practical usage. I want to expand on it later on though and potentially make it more useful, but I’m pretty happy with it for now. Let me know if you have any ideas for functions for this app and I’ll be sure to reply with my thoughts! Hopefully you got something out of this, regardless of the shenanigans.
Future enhancements?
- Add command to silence the bot
- Authorize commands based on role in server
Build Log
This section contains the high level overview of the process I took to create this bot. You can skip this part, unless you need to troubleshoot any of the steps in between or if you’re just interested in the process.
- Create Discord bot
- Set up Node environment
- https://developer.mozilla.org/en-US/docs/Learn/Server-side/Express_Nodejs/development_environment
- Install Node v12+
- https://nodejs.org/en/
- Install ‘Recommended For Most Users’
- https://developer.mozilla.org/en-US/docs/Learn/Server-side/Express_Nodejs/development_environment
- Install Discord.js
- Create Node app
- Dockerize app
- Install Docker on Raspberry Pi
-
Run app on Docker on Raspberry Pi
-
Create scripts to find audio files
- Create startup scripts
- Create cronjobs to start the app automatically
Miscellaneous Frustrations
This section includes exactly what it says on the label; frustrating parts of this project that took forever to figure out and almost made me give up. I ended up learning a ton from this project, so I suppose you should take that as one of the lessons from this guide. Definitely skip this section, unless you’re curious about why this video/guide took a long time to make.
1. Attempt at using Python to find audio files Playing audio in a raspberry pi docker container is harder than I thought…
- First, I tried to figure out how to make the audio play through the raspberry pi. There was something called omxplayer that gets installed with the raspberry pi base image and I figured this could probably come in handy. (more on this later)
- Then, I tried to figure out how I would get youtube videos/audio to play within the app. I knew that this would require some type of npm package magic, and thankfully there were a few different options. I only had luck with ytdl-core and it worked great for downloading youtube videos.
- Then, I tried to figure out how to play sound from within the docker container. I tried almost any npm package I could find for playing audio but they all didn’t seem to work. I was stuck on this step for hours and my search for a solution spanned days. I kept thinking of ways to rephrase my question but it kept giving me the same or similar results which kept leading me astray. It almost made me want to give up and run the app on the Pi locally instead of within a Docker container, but I knew there had to be a way to do this. It was only when I went back to the start of this all that I realized what I had to do. See, omxplayer is already installed on the raspberry Pi, so if I could figure out a way to call the omxplayer command from within the app container, that would solve my issue. However, since the audio file that gets downloaded from the app is stored within the app, I had to figure out a way to run the omxplayer command from within the app. Somebody on stackoverflow seemed to have the same issue, but the accepted answer didn’t really make sense to me and the second answer seemed stupid. It was only when I scrolled down to the third answer that I realized what I needed to do.
- The solution was to actually figure out a way to get the video file from the app container and have a different script running on the host machine to look for that file and run the omxplayer command if it saw the file. I thought back to the Docker tutorial and remember named volumes and bindmount volumes and from there the floodgates opened. There is a way to link the host filesystem with the container file system, and you do so by running this command. Then, whatever files get put in the container directory specified in the command also get uploaded to the specified host directory, which enables me to interact with it on the raspberry pi.
Research:
- https://www.raspberrypi.org/documentation/usage/audio/README.md
- https://www.raspberrypi.org/documentation/raspbian/applications/omxplayer.md
- https://www.npmjs.com/package/node-omxplayer
- https://stackoverflow.com/questions/32163955/how-to-run-shell-script-on-host-from-docker-container
- https://www.digitalocean.com/community/tutorials/how-to-share-data-between-the-docker-container-and-the-host
- https://github.com/fent/node-ytdl-core
2. Text to Speech troubles
- I tried to use Python again (tried Python for watchdog), but for a different thing this time. This time, I wanted to make a way to convert text to speech (which was actually the main objective of this project, the other stuff came in later). I first tried using pyttsx3. This was working fine while testing on my Mac, so I copy/pasted the script over to the Pi and built it into the watchdog script… I tested it, and it didn’t work. There were no errors, even when I turned on debugging. Which was super helpful. I tried for a couple hours to get it to work and ended up going to the developer’s Github to see if there were any known issues with the package and the Raspberry Pi. Based on what I read, I gathered that there were a plethora of issues but not necessarily related to the Pi… there probably is a way to get it to work on the Pi, but I explored alternate methods.
- It turns out one of the components that pyttsx3 is reliant on, an apt package called espeak, can already do text to speech. The problem was that I couldn’t get espeak to play the audio from the text to speech. A very special ‘Thank you’ to all the guides that did not mention what to do if you CAN’T hear audio when trying to use espeak to play audio. THANK GOD that espeak is able to write to a file, because that way I can use omxplayer to play the .wav file that espeak creates.